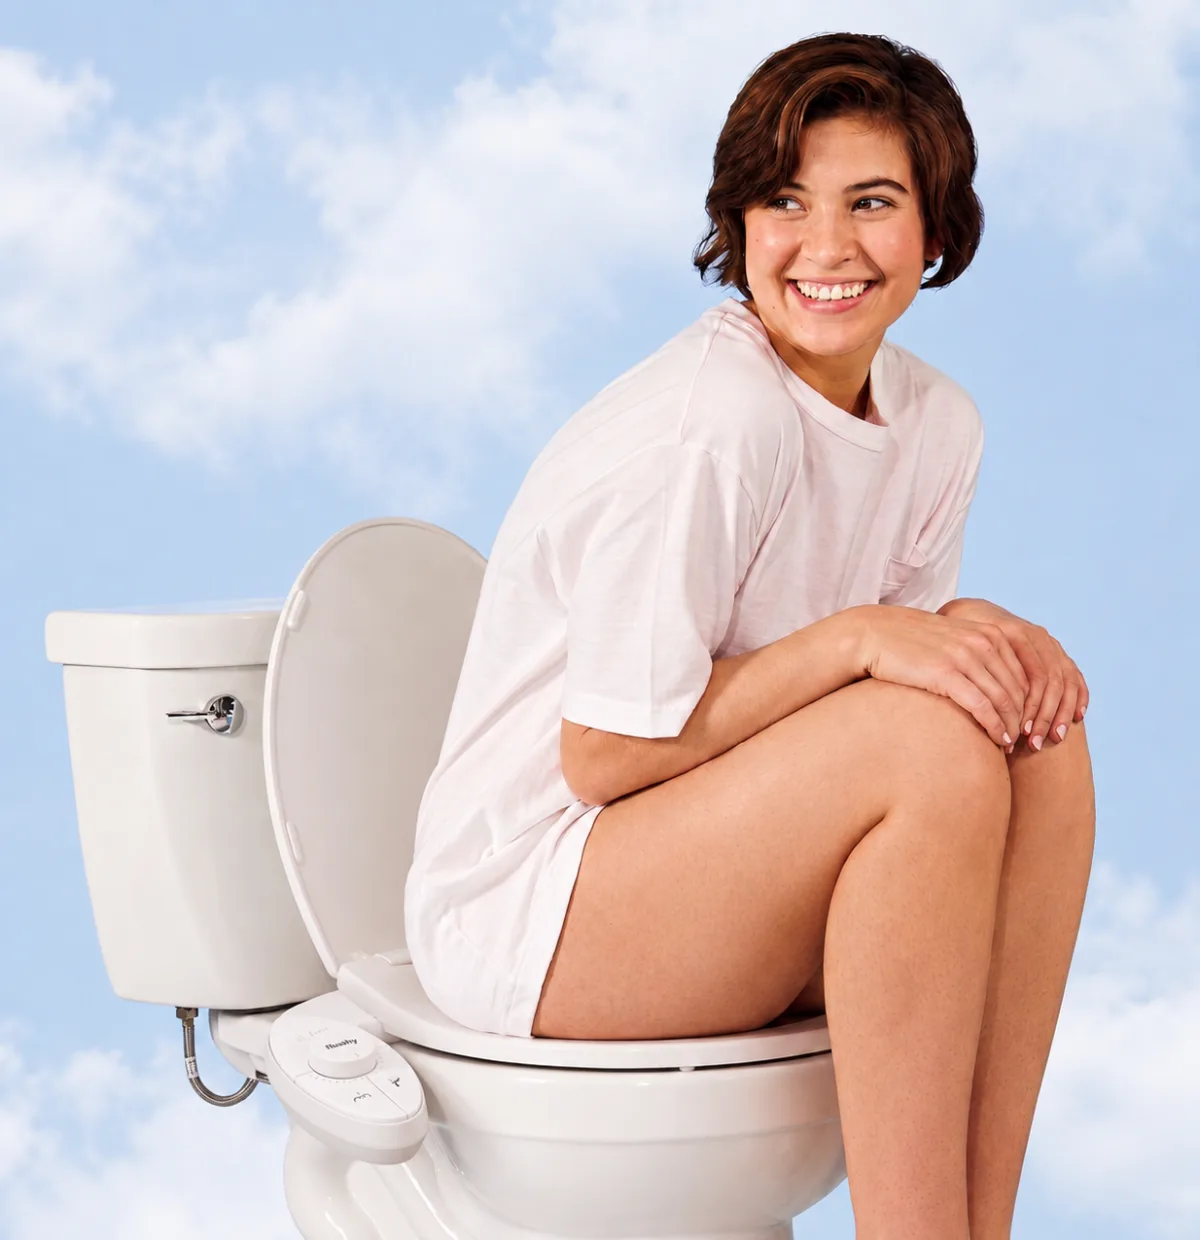
Keep the plumber's number in your pocket. You don't need to know your ballcock from your drip leg to install a bidet. Unlike free-standing bidets, bidet attachments connect to the toilet you already have in minutes — using the pipes already running through your walls and tools already in your junk drawer.
Every brand has slightly different specs, but the fundamentals are the same. Turn off the water. Remove the toilet seat. Attach the bidet. Replace the seat. Turn the water back on. Let's do this.
What You'll Need
Tools (not included with your bidet)
- Screwdrivers (flathead or Phillips-head, depending on your toilet seat screws)
- An adjustable wrench or pliers for the hoseline connections
- A towel for knee padding and to mop up any spills
- A bowl to catch residual water in the hoseline
- Thread tape (optional, but handy for a perfect leak-free fit)
In the box
- Flushy bidet attachment console with self-cleaning nozzle
- Braided steel hoseline
- T-valve tank adapter (fits standard UK 1/2" connections)
- Rubber washers and spacers
- Illustrated quick-start guide
Before Installing Your Bidet
- De-water. Turn your toilet's water supply valve off at the base of the cistern. Then hold down the flusher to drain the bowl as much as possible. You might still have an inch or less of residual water, which is perfectly fine.
- De-seat. Remove your toilet seat. You may need to flip the screw caps to access the mounting hardware. Unscrew and set aside.
- De-gunk. Your throne will never be this exposed again! Take advantage and deep clean all those hard to reach places.
- De-pants. Just kidding. Don't drop your drawers just yet.
How To Install a Bidet Attachment
Step 1: Connect The Hoseline To The Toilet
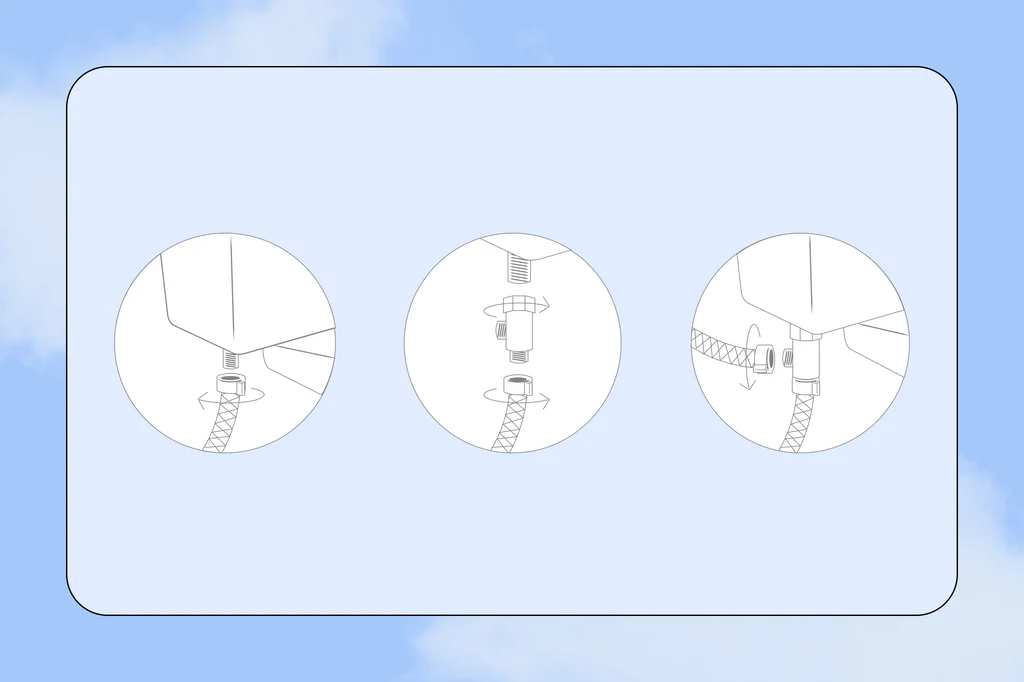
Once the water is off and the toilet seat is removed, disconnect your existing flexible hose from your toilet cistern. Turn it clockwise (if you're looking at the hose from above) and be prepared to catch or wipe up some residual water that might spill onto the floor. Don't freak, it's clean.
Locate the tank adapter in your Flushy kit. Screw the existing hose you just disconnected to the side of this adapter. Then screw the top of the adapter onto the toilet cistern. Be careful not to cross-thread or overtighten — finger tight is perfect.
Screw the provided flexible hose that came with your Flushy to the tank adapter's bottom connection. Again, be careful not to overtighten.
COLD WATER ONLY. Flushy connects to your cold water line — never run it off the hot water line.
Step 2: Connect The Bidet To The Hoseline
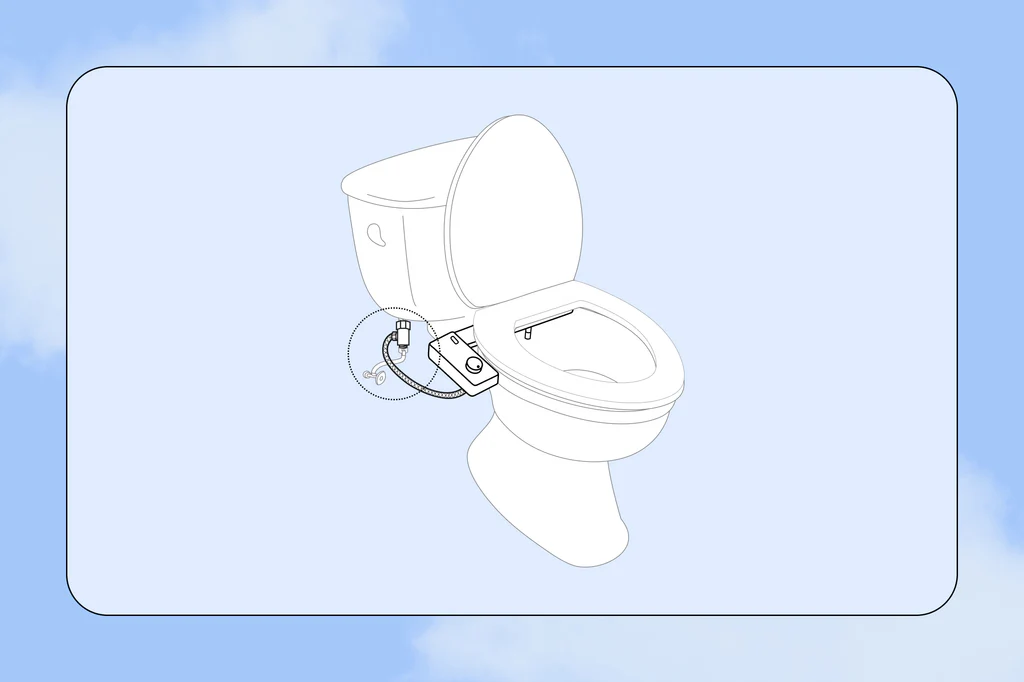
Now attach the same flexible steel hose to the water port on your bidet attachment console. Twist gently — you should turn counterclockwise to finger-tighten.
Notice the hose only turning once before stopping? It might be cross-threading and not sealed properly. Unscrew the hose and re-attach until the threads line up properly. You may need to use thread tape for a perfect, leak-free fit.
Step 3: Attach Your Bidet To The Bowl
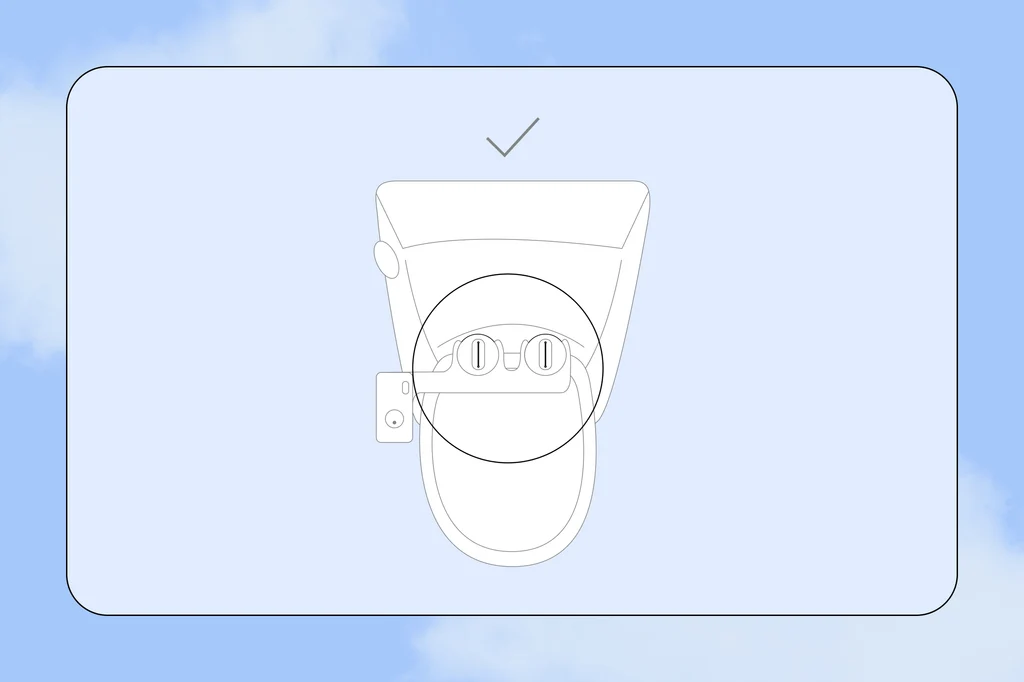
Time to lock it down. Place your Flushy on top of your toilet. You have adjustable flanges — line those up with the holes in between the bowl and the tank used for mounting the toilet seat.
Make sure the nozzle is lined up in the centre of the bowl and as close to the back rim of the bowl without the nozzle touching it.
The nozzle needs enough breathing room for angle range while also having enough depth for booty alignment. You can figure out how much space you need by moving the nozzle adjuster back and forth via the bidet console.
Step 4: Reattach Your Toilet Seat
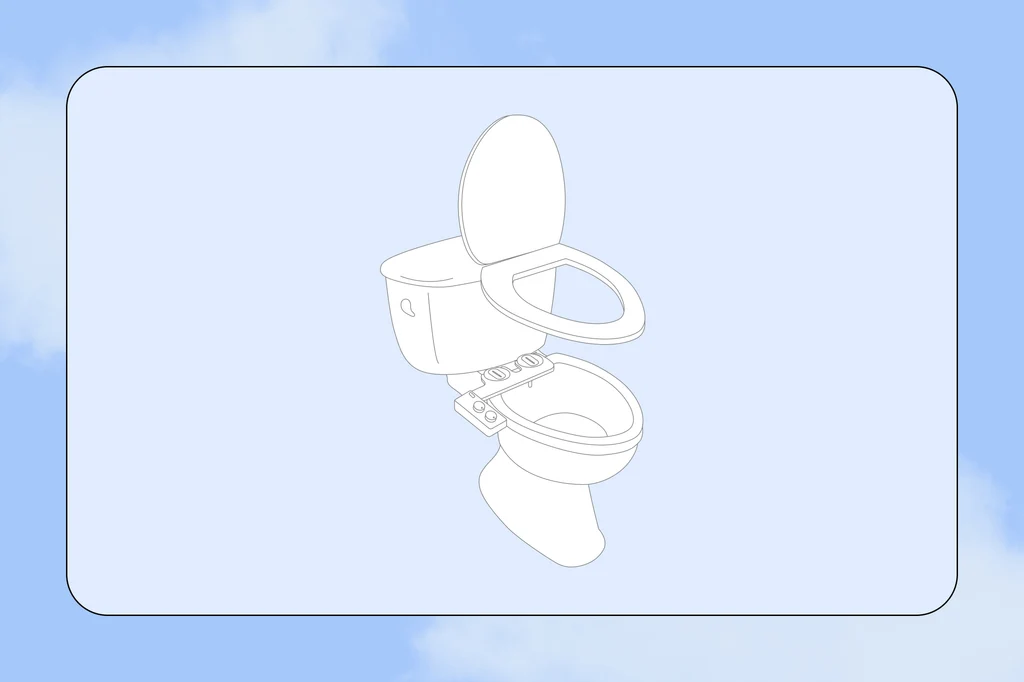
Fasten your toilet seat on top of the bidet attachment by threading the toilet seat bolts through the adjustable flanges and through the toilet's mounting holes. Fasten the bolts by turning them clockwise.
Hold the underside of the toilet nuts to tighten the bolt from the top more effectively.
Step 5: Leak-Check and Butt Test
Turn on your water shutoff valve and check all connection points to make sure there are no visible leaks. If you're leak-free, you are good to go! If you are experiencing leaks, first make sure the rubber gasket is placed correctly inside of the adapter. Second, make sure the threads are aligned properly. Third, make sure the hoses and adapters are tightened completely, but remember don't over-tighten!
DO NOT SPRAY UNTIL YOU SIT DOWN. All bidets need a target and unless your butt is in the hot seat, your bathroom wall is the target.
Start Using Your Bidet!
Now that you know the basics of installing the best butt shower of your life, you can spend every waking moment sitting on it. Turn the pressure dial very slowly to start — household water pressure varies a lot, and there's no need to go full power on your first go.
Play with the nozzle angle and arch your back slightly to get every benefit of washing with a bidet. Once you're dialled in, pat dry with a couple of squares or a dedicated towel and wash your hands.
Read how to use a bidetFrequently Asked Questions
Can you install a bidet on any toilet?
Bidet attachments are designed to fit most standard close-coupled toilets — a bowl, a cistern, and a flexible hose connection between the water supply and the cistern. You'll know you have this setup if all of the water supply connections are visible.
If you have a fully skirted or concealed-cistern toilet, you may need a special adapter. French curve toilets are generally a no-go with a bidet attachment, because the curved shape of the bowl makes it difficult for the bidet to sit flat.
Do you need special plumbing for a bidet?
Nope. You do not need to plumb new lines to accommodate a bidet attachment.
Everything you need is already in your walls and in your Flushy kit. The only small exception is if your toilet uses a rigid pipe water connection instead of a flexible hose — a quick trip to your local hardware store solves that.
Do you need electricity to install a bidet attachment?
No. Flushy is fully non-electric and runs entirely on your existing water pressure, so there's no outlet, no wiring and no electrician involved.
How long does installation take?
Around 10 minutes for most people, including the leak check. The only tools you'll want nearby are a screwdriver, an adjustable wrench and a towel.